It's officially GDPR week and what better time than 2 days before the deadline to implement a cookie notification bar to your site. Now before I get into all the code, this is just my opinion and interpretation of GDPR requirements, so use your best judgment as to what fits your site.
The Plan
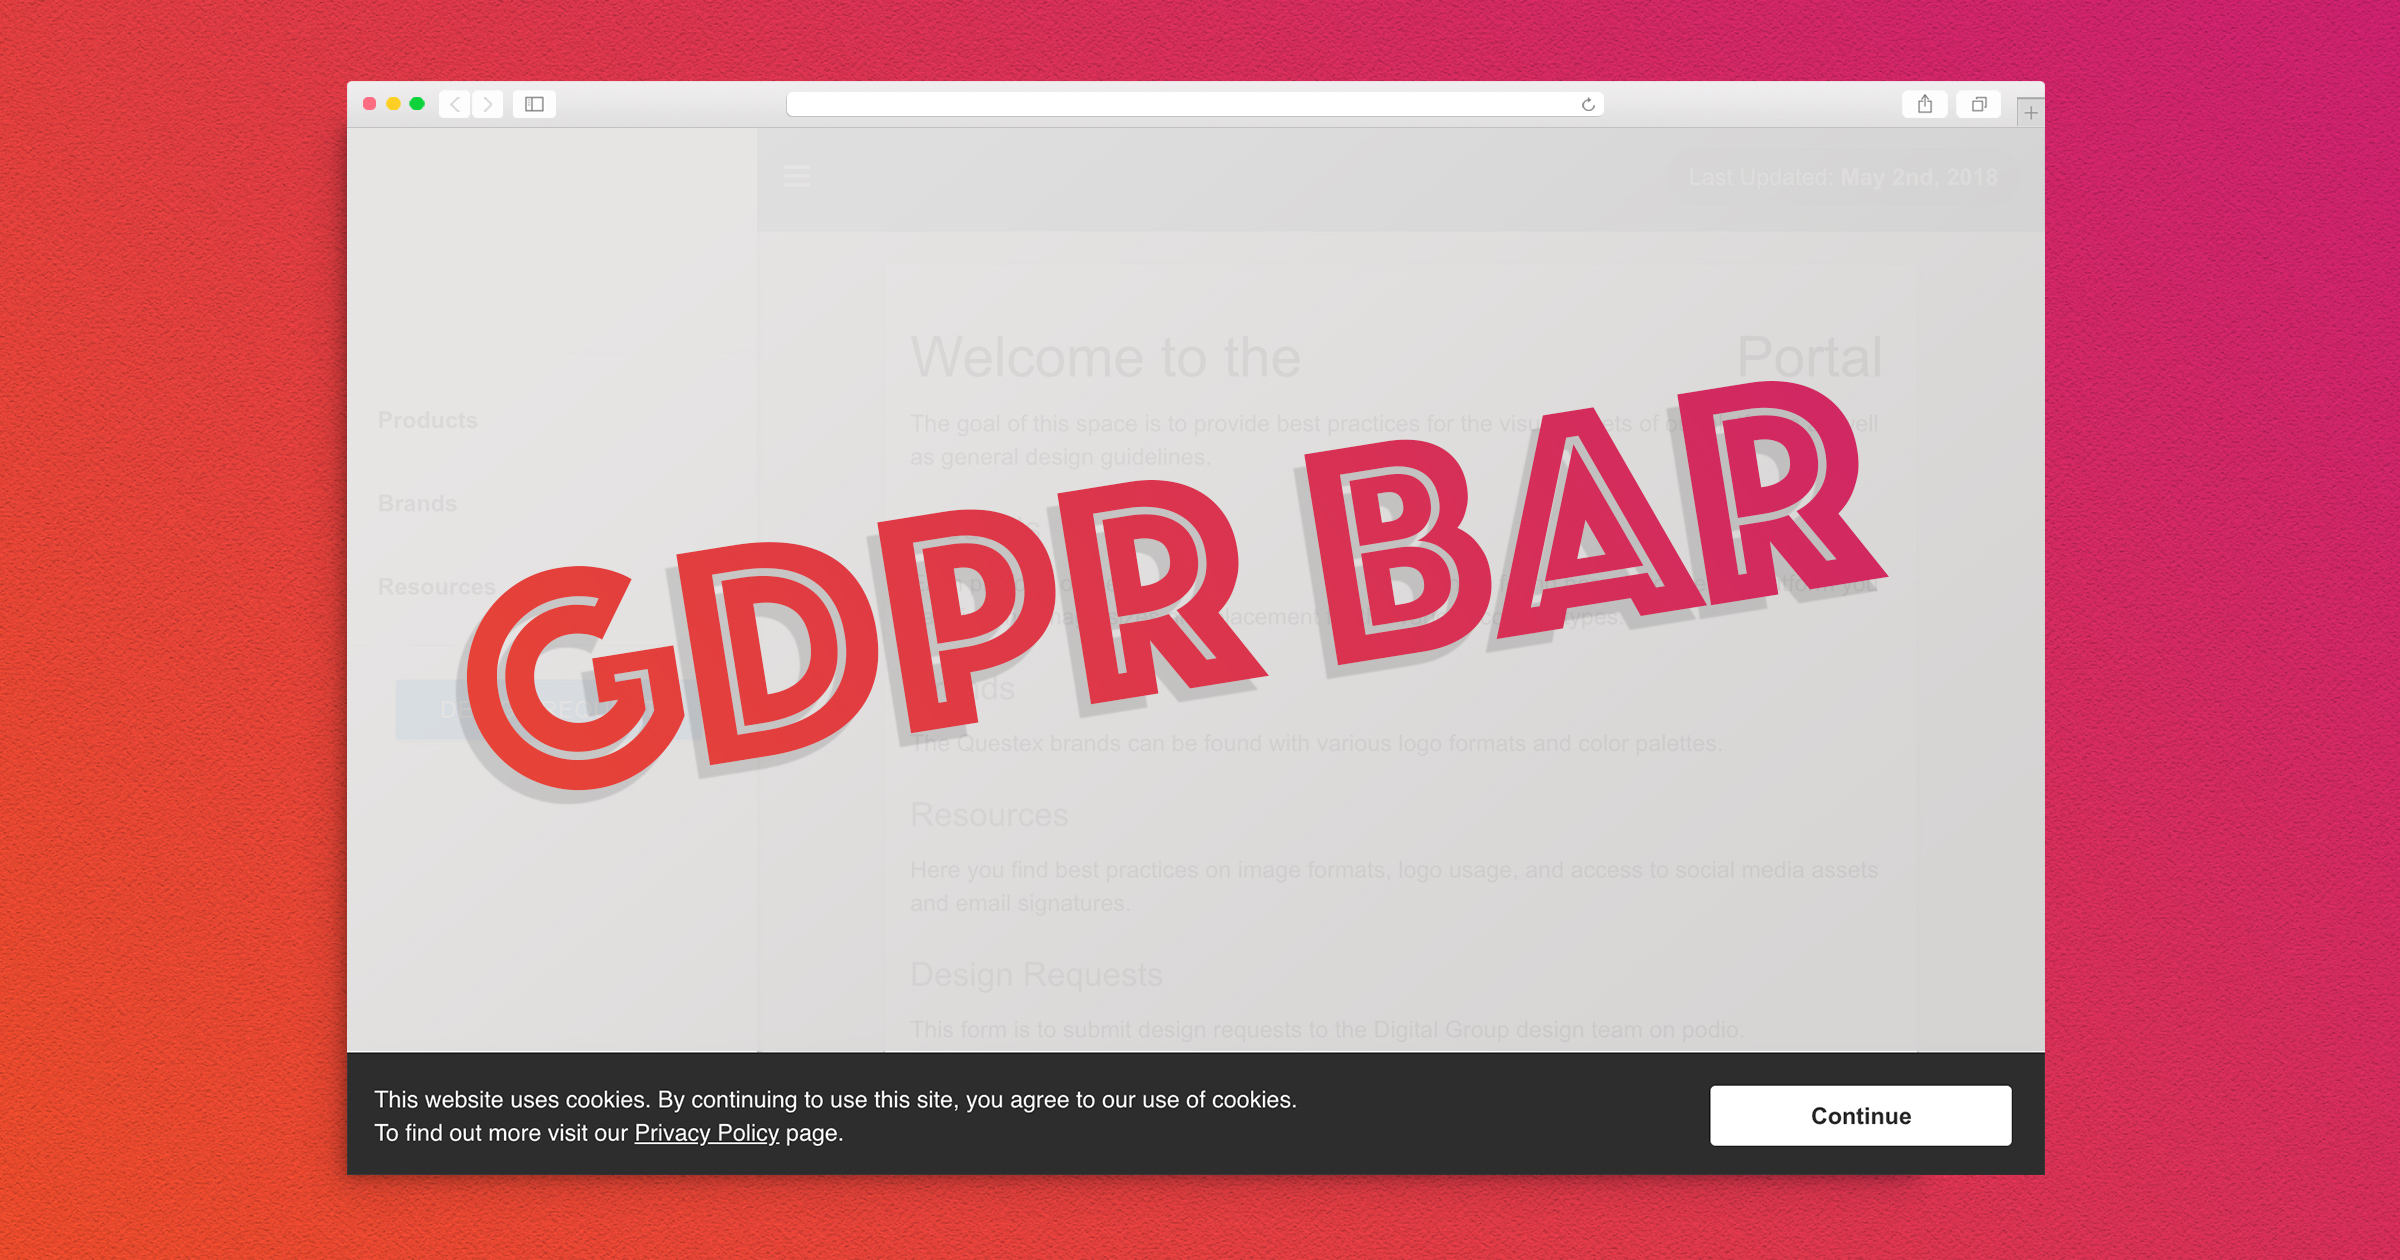
After following these steps you'll have a bottom adhesion bar, with a text disclaimer and button. When the button is clicked the bar will fade away, and the next time the user returns to the page the bar won't appear, as long as they haven't cleared their browser data.
This method will be leveraging localStorage to store the user response. The reason being, localStorage is just client side, so there's no need to send a cookie in the header response and add more weight to the site, if not necessary. This is an IE10 and up safe solution. I will be demonstrating the basics of a cookie fallback solution for older browsers as well.
Let's get started!
1. Create The Cookie
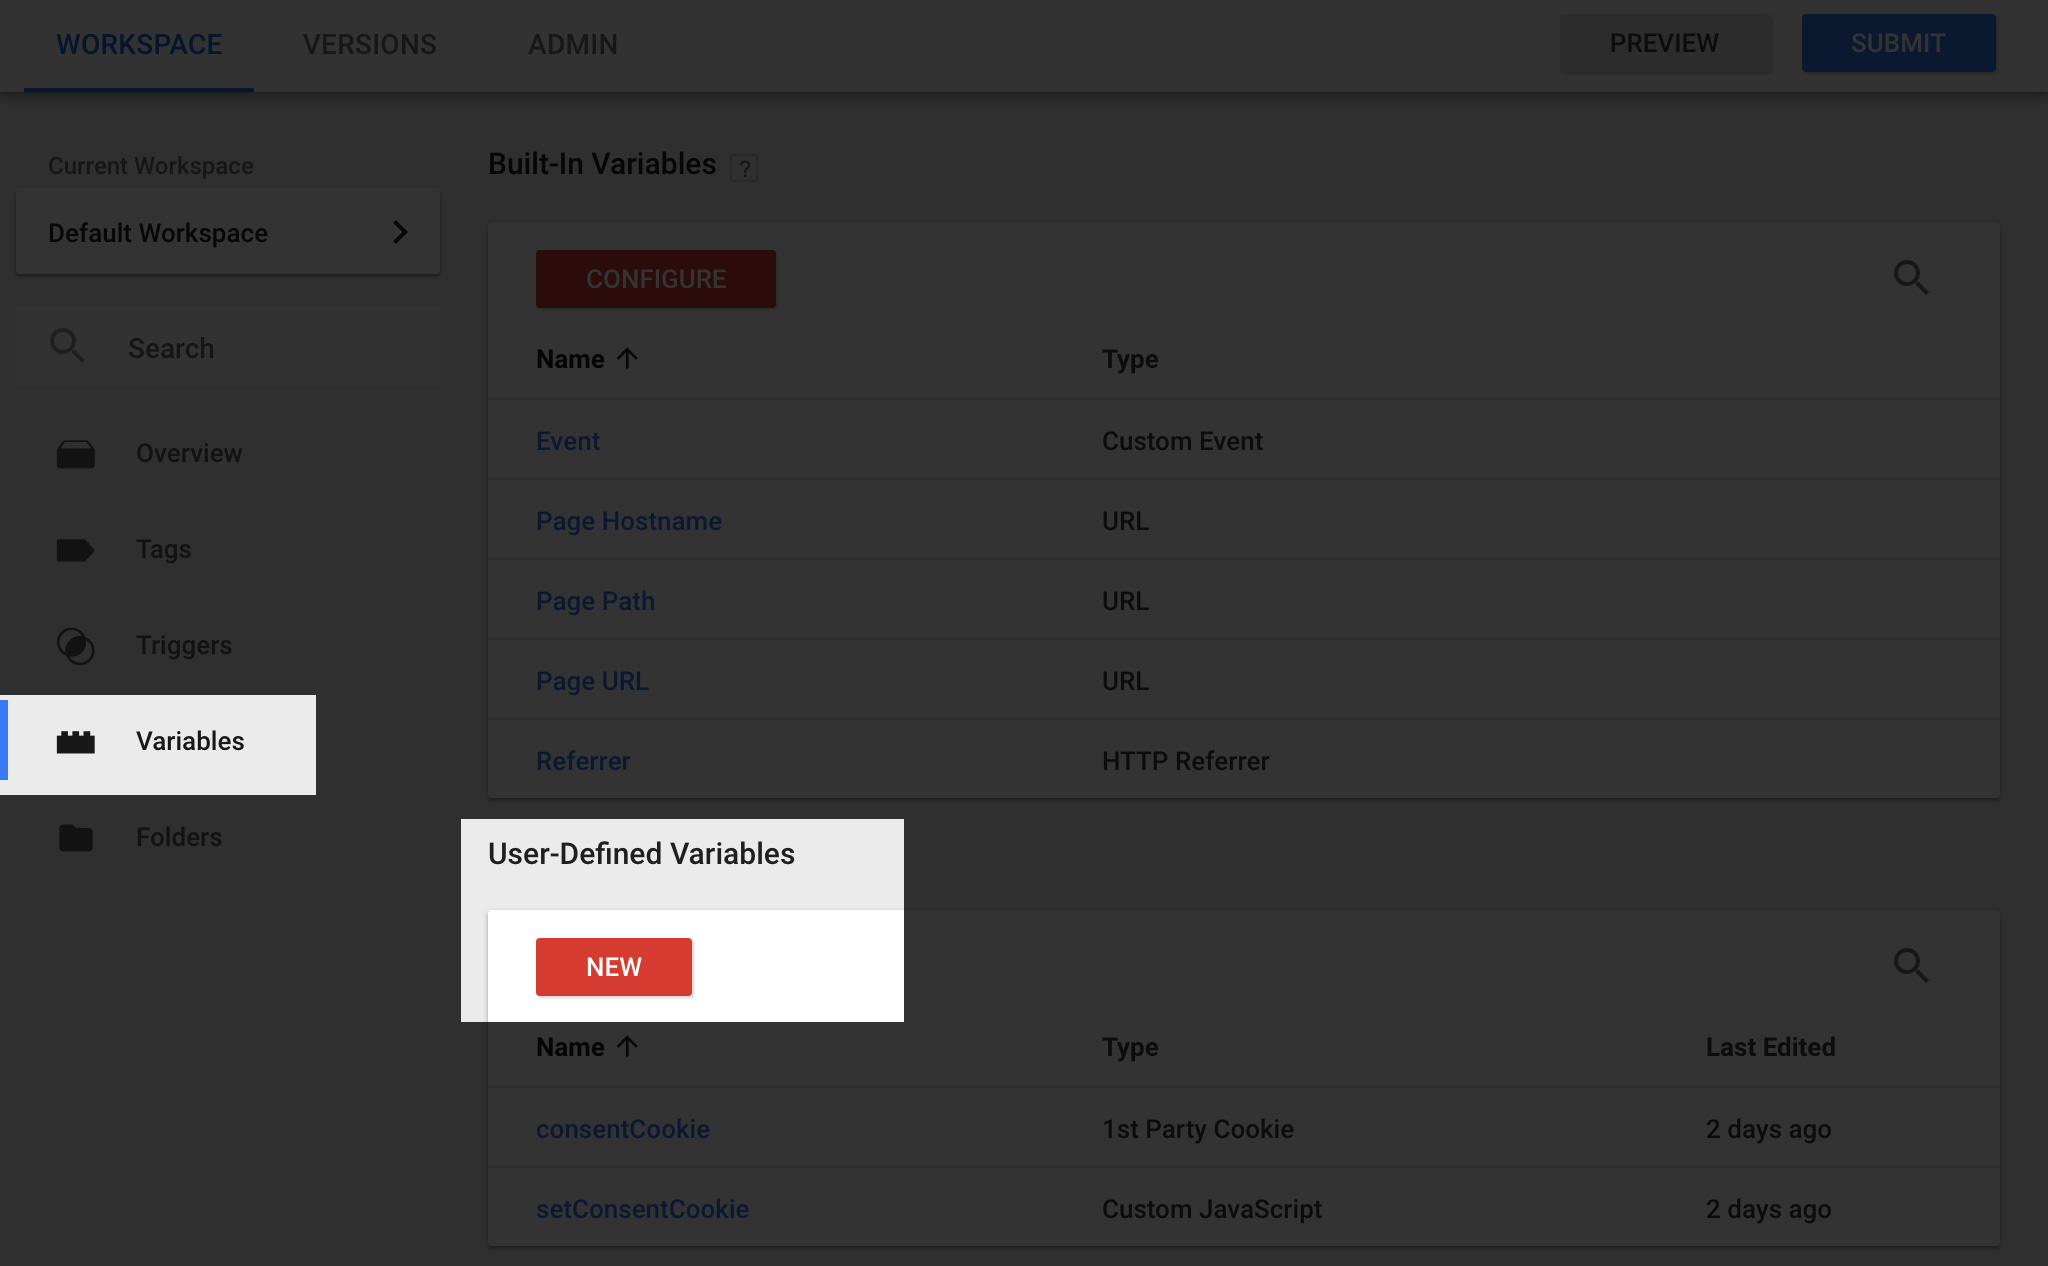
In Google Tag Manager, open your workspace and go to the variables tab. Here you will add the variable to be used when a user accepts the cookies. Click on New under the User-Defined Variables Section.
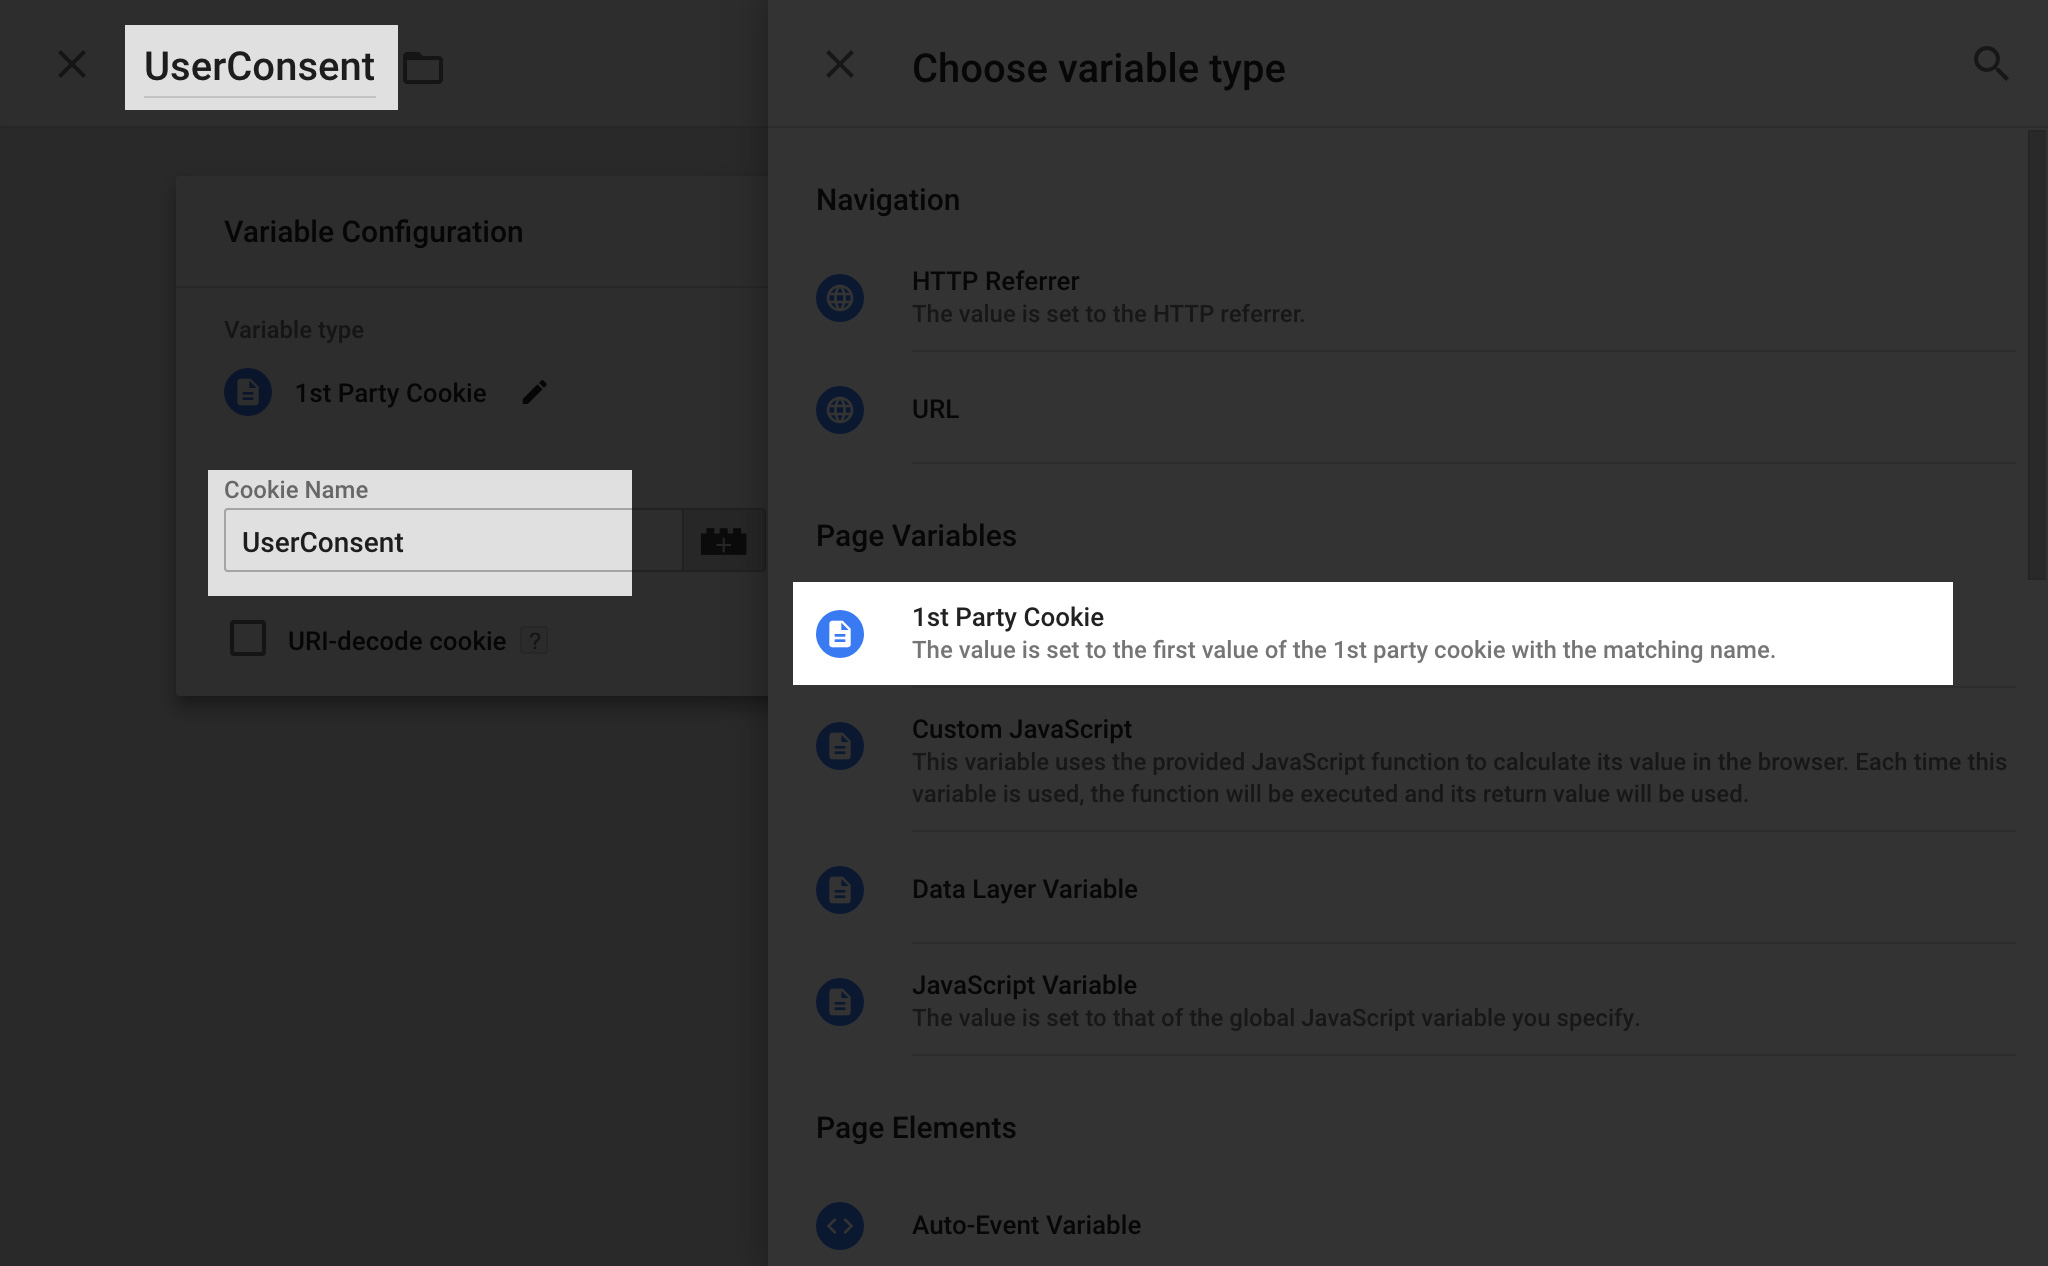
On the screen which opens, give the variable a name such as UserConsent, and click choose a variable type. Here you will select 1st Party Cookie and you can give it the same name as the variable. Once you've done that click save.
2. Create A Fallback Function
On some older versions of Internet Explorer, it's not reliable to use localStorage, as well as no support no Opera Mini. For these use cases, it's best to include a cookie fallback. The way we're going to do this is check for localStorage support in a few areas.
What we're going to need is a function which generates a cookie when we call it. On the same variables tab, click New under the User-Defined Variables Section. Give this function a name such as setConsentCookie and under the type select Custom Javascript.
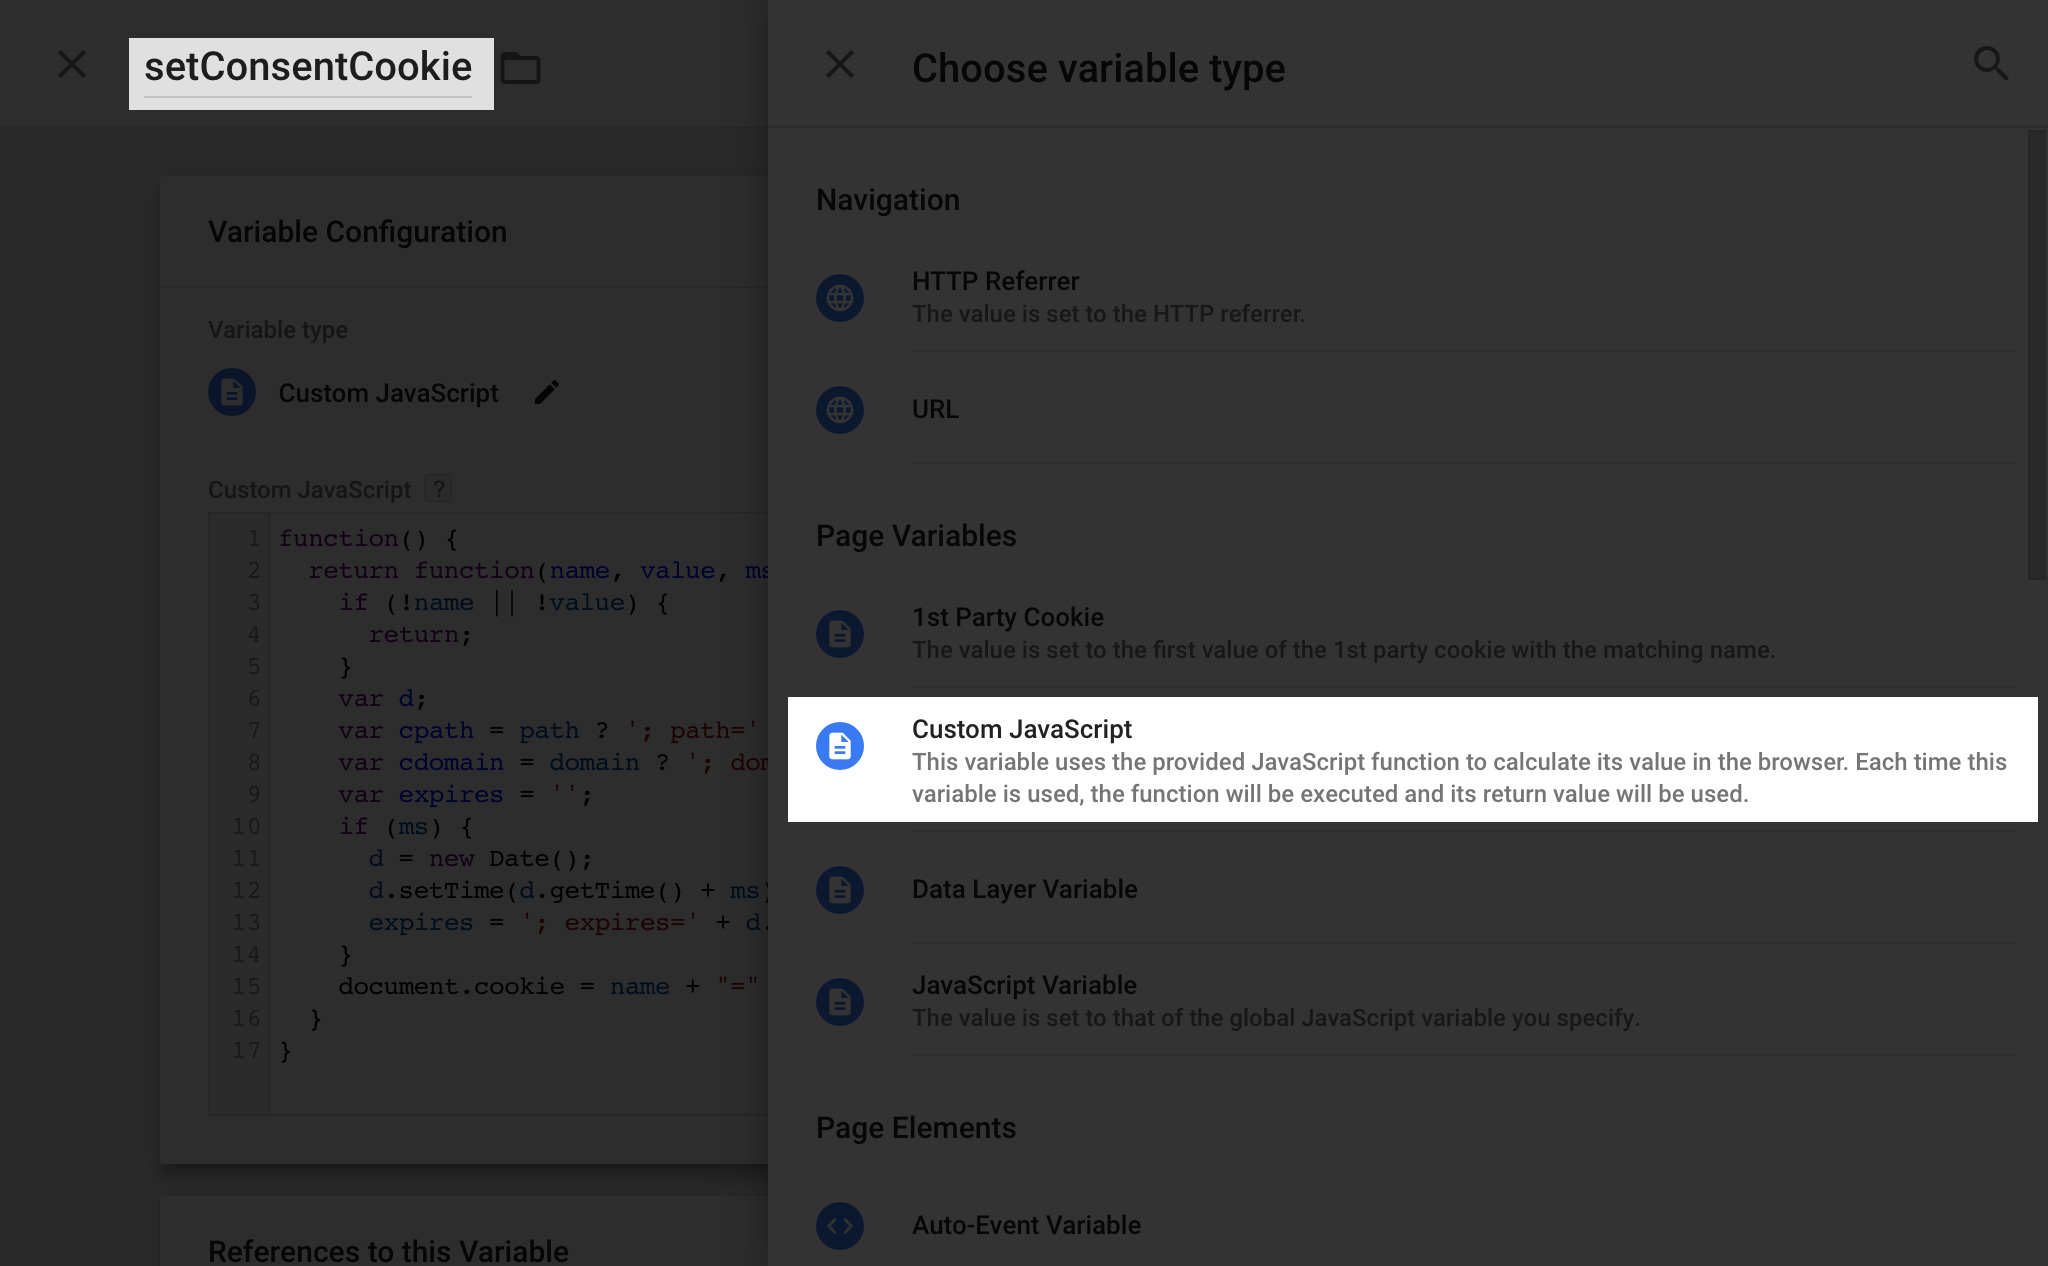
In the custom javascript field add the following code. This function accepts a name for the cookie, a value for the cookie, the duration in milliseconds until the cookies expire, and path info.
function() {
  return function(name, value, ms, path, domain) {
    if (!name || !value) {
      return;
    }
    var d;
    var cpath = path ? '; path=' + path : '';
    var cdomain = domain ? '; domain=' + domain : '';
    var expires = '';
    if (ms) {
      d = new Date();
      d.setTime(d.getTime() + ms);
      expires = '; expires=' + d.toUTCString();
    }
    document.cookie = name + "=" + value + expires + cpath + cdomain;
  }
}
3. Create GDPR Bar Tag
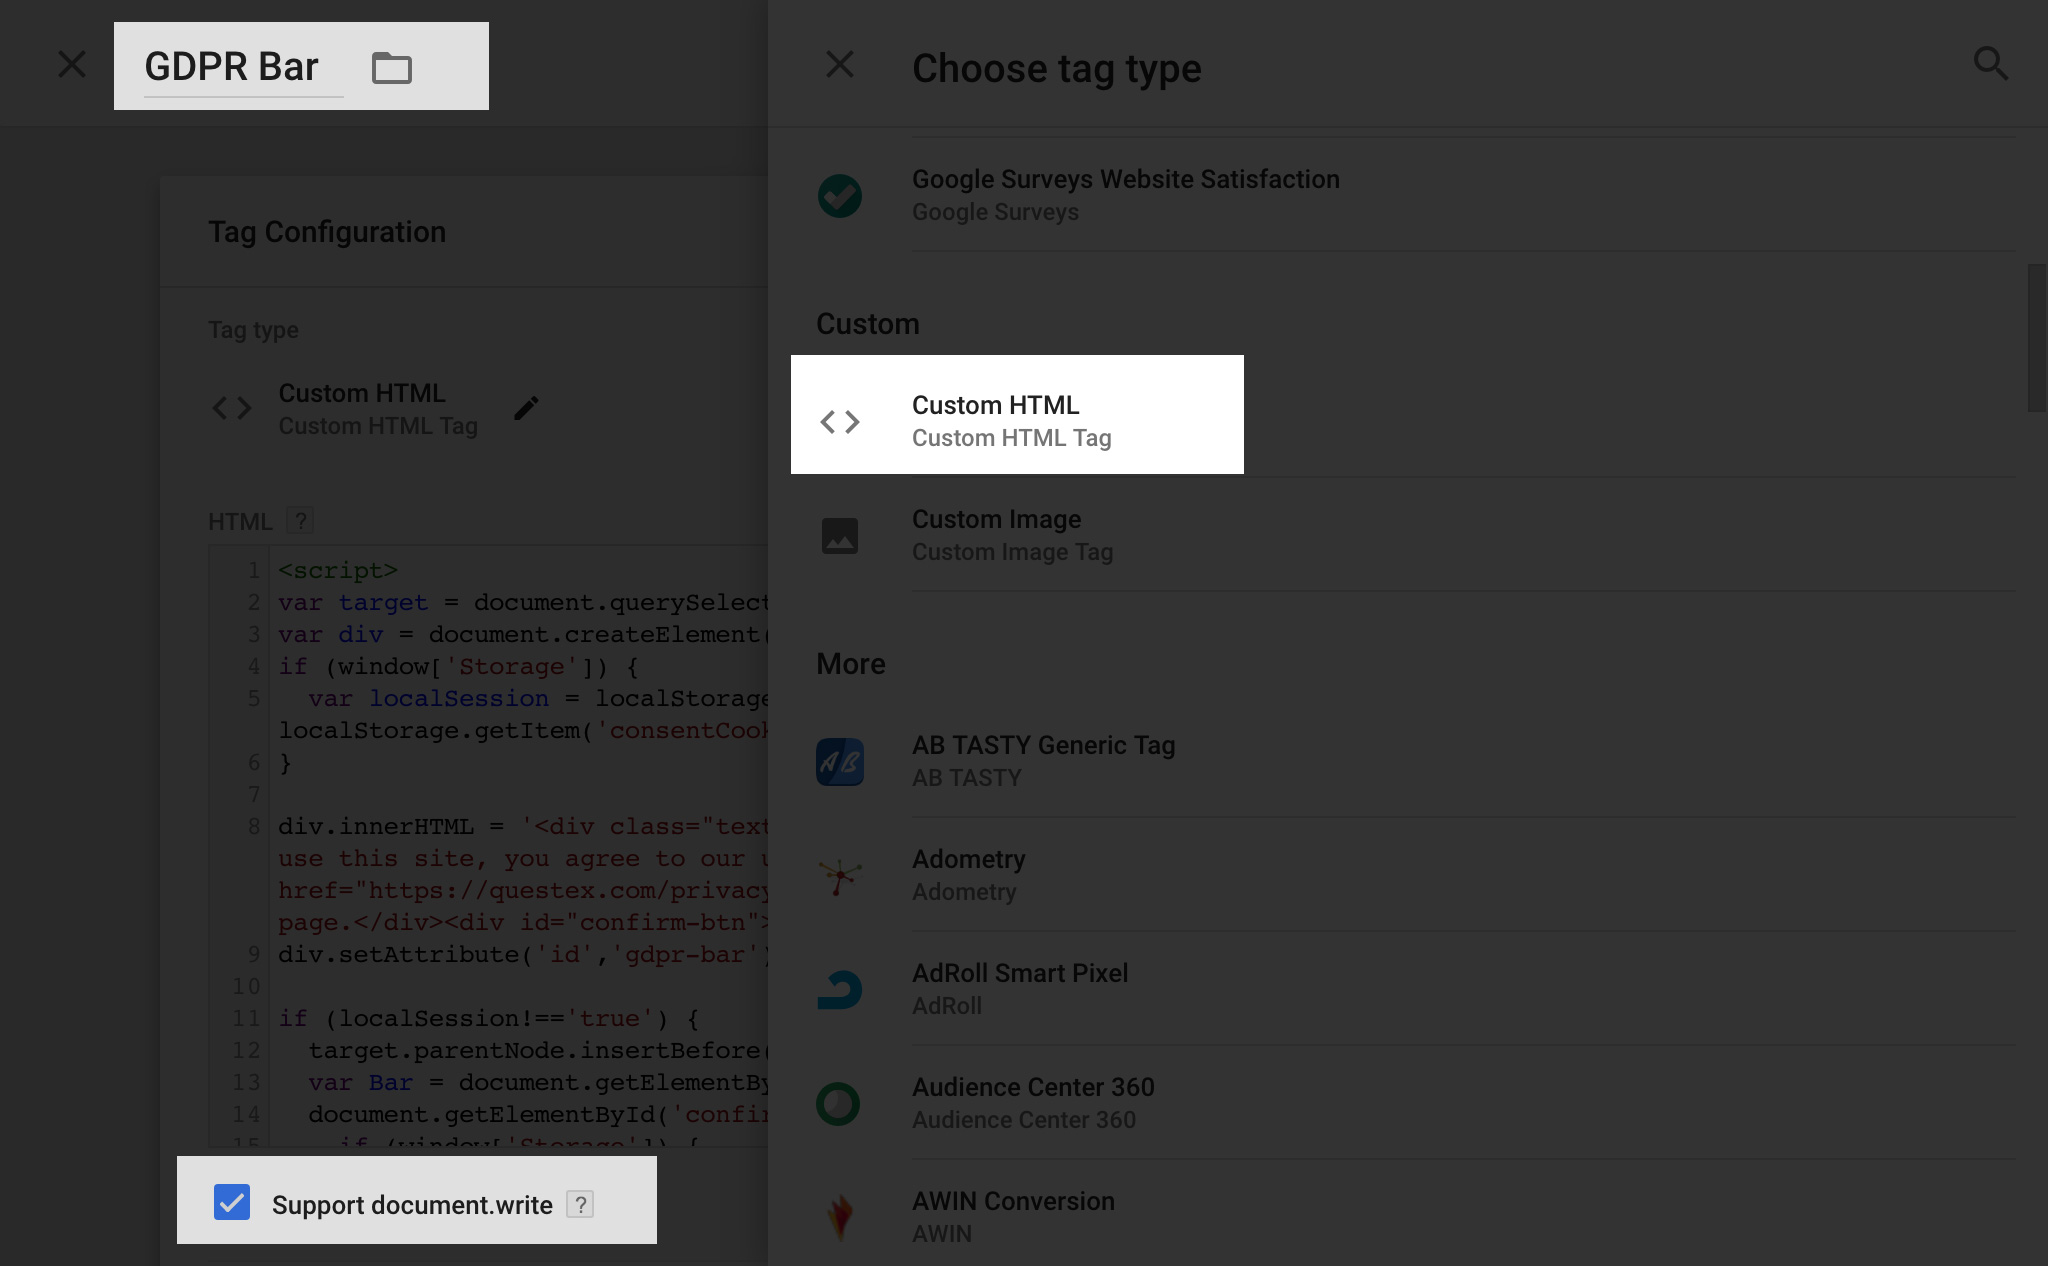
Under the tags section click on new and give it a name like GDPR Bar. Under the type, you will select Custom HTML and for Triggering you will most likely want to select all pages. Under the HTML box make sure to select the "Support document.write" checkbox in order for the HTML to get inserted into the DOM.
In the HTML box there are two main pieces of code you'll be adding, the javascript to create the DOM element, inserting it into the page and the CSS to style everything and animate states. There's two parts you'll want to edit in your own javascript, the URL of your privacy policy and what element in the DOM you're gonna be referencing as the parent. You can select the body
<script>
//Choose a selector that makes sense for your site. Since this has absolute positioning, it will be taken out of the DOM flow, so the location isn't so important
var target = document.querySelector('#content-wrapper');
//Create the div to be inserted
var div = document.createElement('div');
//This checks if localStorage is available, if so it sets a variable to the localStorage value, otherwise it sets the variable to the cookie value
if (window['Storage']) {
  var localSession = localStorage.getItem('consentCookie') ? localStorage.getItem('consentCookie') : null;
} else {
    var localSession = {{consentCookie}};
}
//Set the content of the div, here is where you'll want to change the link for your privacy policy
div.innerHTML = '<div class="text">This website uses cookies. By continuing to use this site, you agree to our use of cookies. To find out more visit our <a href="https://YourDomainHere.com/privacy-policy" target="_blank">Privacy Policy</a> page.</div><div id="confirm-btn">Continue</div>';
div.setAttribute('id','gdpr-bar');

//This executes the code only if the user hasn't accepted the conditions previously, by checking existing of true in the cookie
if (localSession!==true) {
  //Insert the div we created before the one we targeted
  target.parentNode.insertBefore( div, target );
  //Referencing the new div we created in the DOM
  var Bar = document.getElementById("gdpr-bar");
  //Listen for a click on the confirm button. And if localStorage exists set the variable to true. Else use cookies to set the variable to true.
  document.getElementById('confirm-btn').addEventListener('click', function() {
    if (window['Storage']) {
      localStorage.setItem('consentCookie', true);
    } else {
      {{setConsentCookie}}('consentCookie', true);
    }
    //Now that the button is clicked, we add a class which contains the exit animation
    Bar.classList.add('gdpr-exit');
    //After the animation is complete, remove the element from the DOM
    var removeBar = function() {
      Bar.parentNode.removeChild(Bar)
    }
    setTimeout(removeBar, 300);
  })
}
</script>
The next part we'll add to the HTML box below the script is our CSS. I'll note where you might want to change the background color of the bar and text color of the button.
<style>
#gdpr-bar {
  position: fixed;
  bottom: 0;
  left: 0;
  background: #333333; /* Change background color of bar here */
  width: 100%;
  color: white; /* Change color of bar text here */
  padding: 10px 20px;
  box-sizing: border-box;
  display: flex;
  justify-content: space-between;
  align-items: center;
  box-shadow: 0 -4px 10px rgba(0,0,0,.1);
  z-index: 9999;
  animation: enter .3s ease-out;
  flex-wrap: wrap;
  }
#confirm-btn {
  background: white; /* Change color of button background here */
  border-radius: 3px;
  color: #e97623; /* Change color of button text here */
  padding: 8px 60px;
  margin:10px 0;
  cursor: pointer;
  text-align: center;
  font-weight: bold;
}
.text {
  max-width: 570px;
  font-family: sans-serif;
  font-size: 14px;
}

.text a {
  color: white; /* Change color of link text here */
  text-decoration: underline;
}

.gdpr-exit {
  animation: leave .3s ease-out !important;
  animation-fill-mode: forwards !important;
}

@keyframes enter {
  from {
    transform: translatey(80px);
    opacity: 0;
  }

  to {
    transform: translatey(0);
    opacity: 1;
  }
}

@keyframes leave {
    from {
      transform: translatey(0);
      opacity: 1;
    }
    to {
        transform: translatey(80px);
        opacity: 0;
    }
}
</style>
Final Product
After hitting publish you should have a cookie consent bar on your GTM enabled page. The bar will slide up, and once a user clicks confirm it will slide down. After which, whenever they return to the page the bar will not appear as long as the user hasn't cleared their browser data. Let me know if you have any issues with this method or getting it to work on your site.